How to shoot the Food Photography that makes the viewers crave what’s on the screen? For this you need to master photography skills. To nail it, photography courses offered by a well-renowned institute like Hamstech are the best. Here we are going to discuss the simple tips to adopt that gives you a mouth-watering output of food photography.
Every image is different & unique. And there will never be just one rule that applies to all of them. That is why the foremost tool of a Photographer is their own eyes. The colour, texture are the crucial part of culinary arts. Chefs say that we eat with our eyes first, which is absolutely true. So, paying attention to light, composition, style and all other settings is necessary for a worthy outcome in photography.
1.Natural Light
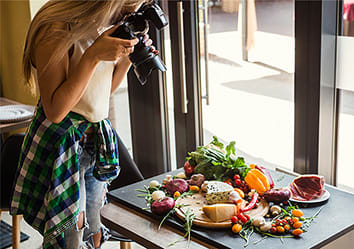
The rays of sunlight will give your food photography the best look than any other filters you make. But don’t project direct sunlight which can give your food a darker shadow. If you are dealing with light-colored food, exposing it to direct sunlight may cause the entire image to be overexposed. Finding a window shaded with tree covering will give your food even light and the best photograph.
2.Flash Light
You just need to use the flash for stylish looks only. Never use flash for food photography. The use of flash may give your food a shiny and animated look. This can also create a confusing illustration. As you want your food photography to make the viewer lick or grab it from the screen, this is not going to be the case if you use the flash in your food photography which makes the food look so oily and greasy.
3.Composition
It is very important to be aware of that, while looking at a photograph our eyes naturally go up to a certain intersection point. If you notice a great food photograph, the main dish is rarely focused in the frame. Photographers style with the utensils, dishes and other background things to grab the attention and interest towards a picture.
Whatever the subject might be but the Rule of Thirds never changes. This is nothing but, image your frame as a 9 grids and position the main subject at the intersections or along the lines.
Now coming to the composition, decide the angle you want to shoot from, which is a very important factor. If your subject is having some height, then you might have to shoot from a slightly tilted angle for the best show-off factor. Otherwise, the subject is so flat and even choosing a bird’s-eye view angle will give you the best outcome. Discover the innovative thoughts when it comes to showing off the best features of different foods.
4.Camera Settings
In camera lenses, there is an aperture which is a hole through which light travels. Aperture deals with the amount of light passing through camera lenses.
For a brighter image, you need to set the wider aperture, so that you will let more light into the camera. And for darker shade, the narrow you set your aperture, minimal light you will be allowed into the camera lenses.
But the most common setting of aperture for food photography is AV mode. This will automatically adjust the shutter speed to get the absolute light for your subject.
Shutter speed is nothing but the speed of a shutter either slow or fast it closes and opens. Faster shutter speed results in darker photographs, which allows less light in. Slow shutter speed is vice versa, i.e. which allows more light in and results in brighter photographs.
ISO has the camera’s digital sensor, when taking a food photography, an ISO of 400 or less is minimum and does not exceed 1600.
5.Establish a style
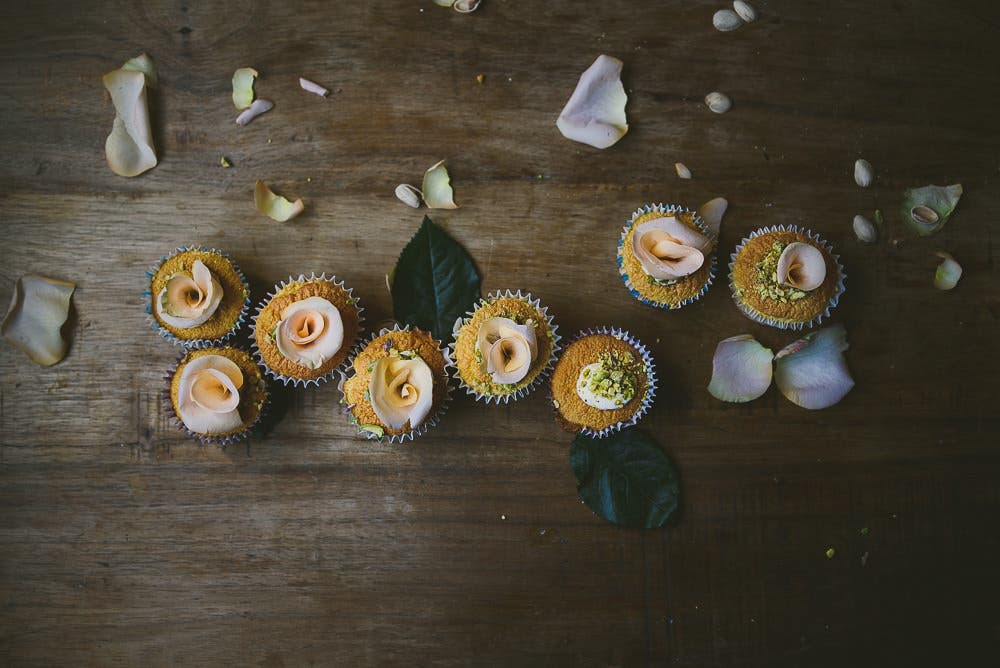
Successful photographers have a signature style that they stick to all the time, especially for food photography. That might be rustic or minimal or any other style, that’s completely left to their own perspective. They have a special style which will differentiate them from others.
You can know your own style by actively developing the skills, by selecting which plate to use, positioning, and adding accessories to the frame. All these will let you discover yourself and create a unique style of yours’.
Once you establish your own style of photographing, i.e. how you want your photographs to look, be consistent and work hard. That’s how you will be on your way sooth by creating unique food photographs of your taste which will differentiate those from others.
6.Food Styling
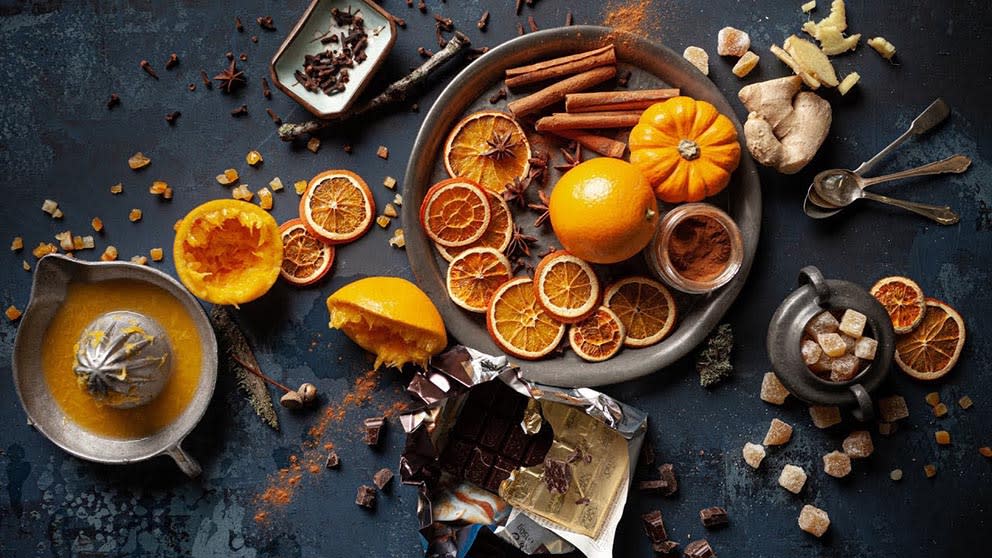
Great food photography also needs great food styling as well. In general we will not have breakfast at our table with scattered peanuts, coffee beans and coconut flakes beside your toast. But you can make it for an appealing view and grab people’s attention.
Here are some styling tips to adopt:
- Choose a best looking plate or a bowl or a serving dish. Opt for wooden plates, marble cutting boards and stone bowls, and don’t get amazed with their working with your food photography.
- Don’t forget about the food cutlery, as it may dive the viewers right in.
- Use the fresh ingredients in the background. A few fresh juicy lemon slices and hot red chilli flakes scattered just right bedside a delicious plate will give it a fresh look and bring into reality. Not only trying with fresh ingredients gives you a great look, sometimes try with the dried flower and leaves, which will highlight the main dish.
- See the magic by adding cloth napkins to your pictures. They add colour and texture to your image. An embroidered napkin beside a bowl of soup and a classic coloured napkin beside a dark and colourful dish will pop up the image.
- The foremost thing is not to forget garnishing your dish. Even a single leaf of coriander or mint will add extra flavour to your picture and take your image to the next level.
7.Extra Equipment
Instead of relying too much on the weather and time of a day, invest in more equipment that can help you to get a great image.
If you don’t even purchase equipment, know what each item will help you get a better image. And this is how professional photographers manipulate things for a great shot.
- Tripod – when professional food photographers shoot for high-profile recipe books and food magazines, they always have a tripod on deck. If you observe keenly, even a simple small shake can be seen in large, high quality photographs. In food photography the more you focus on the subject the better it is.
- Bounce Card – It is a large white surface which is used to reflect the light onto the subject. This helps to eliminate unwanted shadows of the subject. This will also help get an evenly lit shot.
- Black Board – If you want to create an image either in darken form or to avoid the over exposing of subject, a black board helps to remove the light from an image. These look similar to the bounce cards but instead of being in white as a bounce card, it resembles in black.
- Artificial Light – As we cannot assure the natural light, window shaded with trees, most professional photographers opt for artificial light. For this use studio lights with softbox attachments which resemble a natural light.
Instead of investing on light fixers you can also place two table lamps on either side of your subject and bounce cards to reflect the light for a good frame.
8.Filters and Editing
These days many of us know the basic editing techniques. And we all know software like Photoshop. But it isn’t always necessary for a flavorful picture.
Anyway, the basic colour correcting software can help the good food picture look great. But, a great thing is that many photo-editing softwares are available for download which makes them easier to use.
You should always ensure that the image looks as natural as possible because some filters may make the food look fake which gives an unnatural texture to the subject.
9.Trust your eye
Sooner or later, the best food photography comes by trusting yourself. If you follow all the steps and still feel it isn’t good, don’t feel afraid to break the rules. Just break the rules and be confident. Even if you are not confident about your photographs, there are a lot of other sources to explore. Peek into them which will take your food photography to the next level.
Photography Courses
Want your passion for photography to step into a profession? You can be a successful photographer, if you can nail the creative art behind photography. To ace this skill from choosing the right frames and subjects, only possible with the right kind of photography classes. You just need to be as consistent as you can, as there is a lot more to learn to be a professional. For this, you need to choose the right Photography Course and college.
Hamstech with its experience of over 29+ years in the field, is best for learning at the Photography Course Institute in Hyderabad. You can get constant support from our professionals and a celebrity mentor, AVINASH GOWARIKER which helps you to enhance all your skills in photography. Hamstech provides you a four variety of photography courses, through which you can be a master and step into your career as you like.
Also Read : Best Photography Niches to Master In
For your reference Hamstech offered courses are as follows:
- BA Hons in Photography & Digital Imaging is a 3-years degree course and is curated into 5 semesters. Focused on teaching techniques involved in Photography.
- Certificate Course in Photography is a 1-year course which gives an opportunity to develop the skills and knowledge in photography in a short time.
- Short-term Course in Photography is just a 3-months course which will not only help you to learn about photography but also teaches you the technical elements in just 3 months.
- Weekend Course in Photography is a 1-year course which helps students to participate in workshops, exhibitions and site-visits for practical training.
Our Photography Course students can opt careers such as:
- Professional Photographer
- Fashion Photographer
- Product Photographer for e-commerce sites
- Travel Photographer
- Forensic Photographer
- Photojournalist and much more.
So, why wait? Sign in to our Hamstech website at www.hamstech.com and enroll for a Photography Course and give a first step to start a journey towards your dream career.

